I started writing this post in 2018, shortly following a class I took on nanofabrication. The class focused on two methods of nanofabrication: e-beam lithography and DNA origami. I originally intended on writing a detailed introduction to DNA origami, but I don’t think I remember enough to do that now. Instead, I’ll briefly describe DNA origami and then show the results of our attempts to fabricate a split ring resonator as a class project.
Brief introduction to DNA origami
In 2006, Paul Rothemund published a paper in which he combined the art of paper folding with DNA. A DNA molecule is a double-stranded helix. Each strand is a chain of four repeating molecules — cytosine, guanine, adenine, and thymine (C, G, A, and T, respectively). Cytosine and guanine are complements and so are adenine and thymine. A single-stranded DNA can bond to a complimentary chain. For example, the chain represented by the sequence GTCTA can bond to CAGAT, but not any other sequence. In this way, a long single-strand of DNA (derived from a bacteriophage) with it’s known base-pair sequence can be folded by selectively targeting two parts of the strand with a separate “staple” strand. Half the staple strand targets part of the longer strand while the other half targets a different part. This can be used to create (nearly) arbitrary shapes in both two and three dimensions. For a better overview of DNA origami, read this Wikipedia article, or better yet, the original paper I cited earlier.
Split-ring resonator
I’ll leave most of the details of split-ring resonators to the Wikipedia article. Essentially, a split-ring resonator is a LC circuit that resonates at a frequency defined by its geometry.
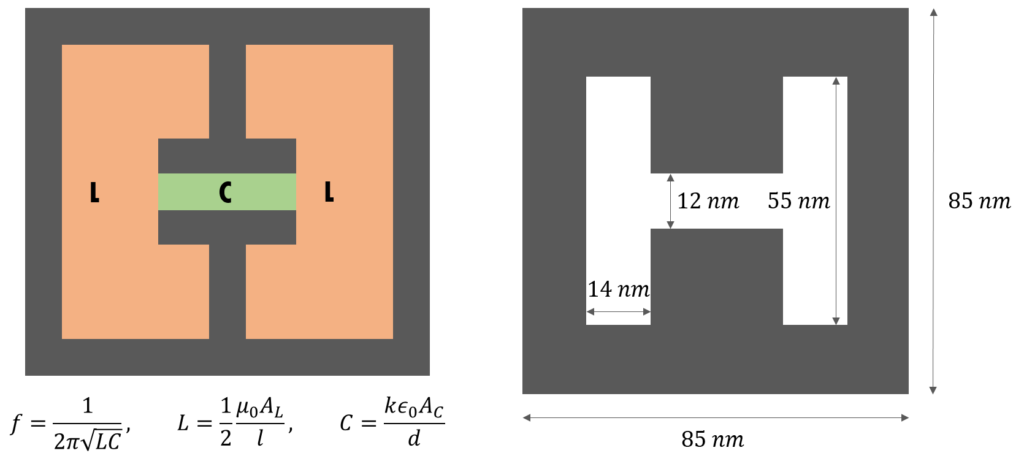
DNA origami is limited in several ways, most notably by the requirement of continuity for the long single-strand of DNA. For the split-ring resonator, we needed a way for the strand to cover the entire structure without it ever looping back on itself. We used a tool called cadnano to design the DNA implementation of the split-ring resonator. In the figure below, you can see the long single-strand represented by the blue line that starts in the top left corner and snakes its way across the structure. Staple strands (smaller lines of various colors) are placed where necessary to bind the structure together.

The cadnano software is able to export the base-pair sequence information necessary to order the staple strands from a commercial supplier. With the necessary long single-strands and staple strands in hand (or rather, in solution), it is a relatively straightforward — albeit finicky — process of creating the DNA origami. The short of it is that the DNA is combined into a single solution, that solution undergoes polymerase chain reaction (PCR), the DNA combines/folds as it cools, and it is finally deposited on a silicon surface to evaporate so the structures can be analyzed.
I am amazed that this even works at all. The fabrication process is essentially random. It is like throwing a puzzle into a bucket, shaking it a bit, and expecting a nice picture to come out. Of course, the puzzle pieces are slightly attracted to where they are supposed to go, but they still have to bump into each other to stick.
DNA origami results
The main challenge with viewing the DNA origami is just that — viewing! How do you image something that is less than 100 nm square and about 2 nm thick? That is too small to resolve optically. We had two possible tools at our disposal: scanning electron microscopy (SEM) and atomic force microscopy (AFM). We were not able to get the necessary contrast with SEM, which required a conductive material be deposited on top of the sample. However, AFM did not require any preprocessing, since the sample was already on a flat silicon chip.
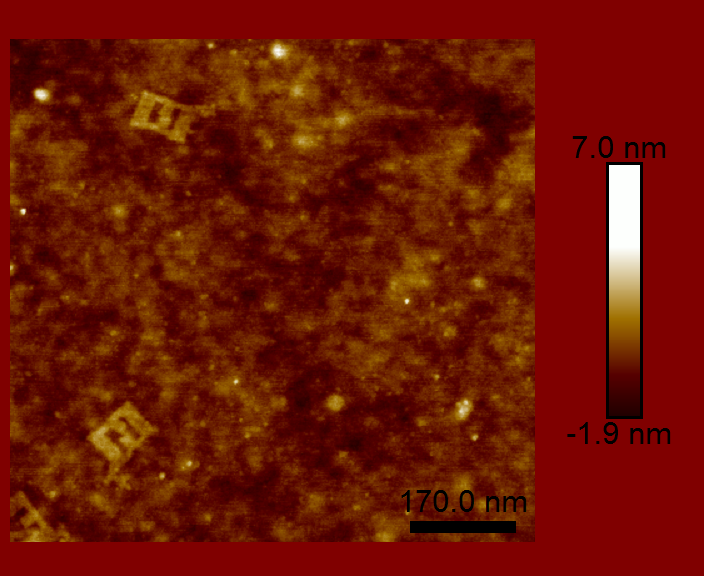
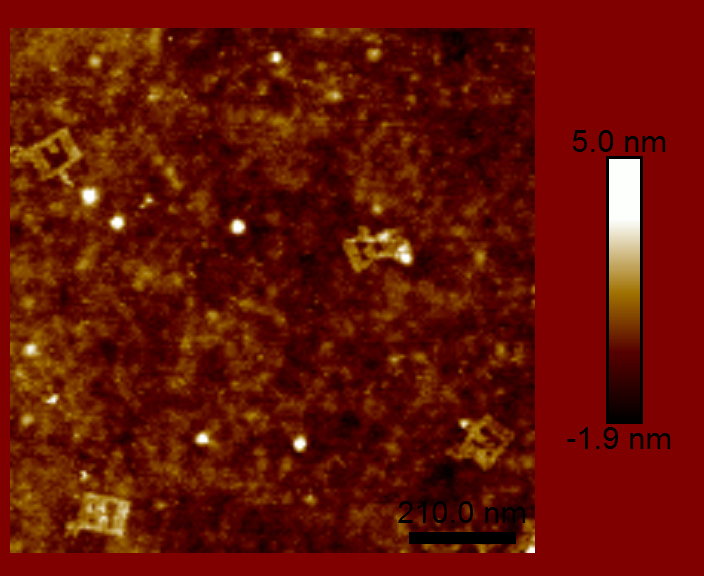
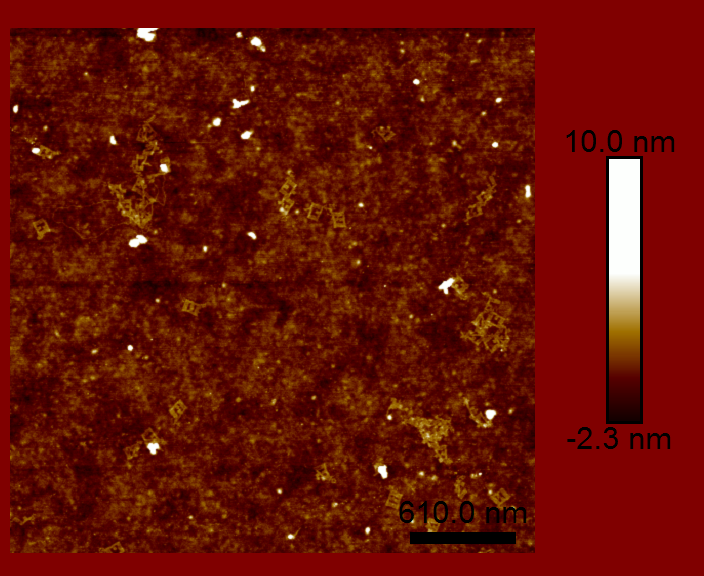
We were able to claim partial success in creating a DNA origami split-ring resonator. The DNA origami part worked about as well as can be expected. The split-ring resonators would also need to be metalized and arrange in an appropriately spaced array (both of which were out of the scope of the class). However, as you can see by the images above, the DNA origami did not maintain the required geometry. There are a couple reasons for this, but the main problem is that DNA is floppy. The DNA origami structure did not have enough rigidity to maintain the desired shape. This structure was great for learning about DNA origami, but would never have made a good split-ring resonator.
You can do this at home
I’m not even joking. You really can do this at home! You can download cadnano, design a structure, order the staple strands and chemicals, cook them for PCR, and deposit the solution on a substrate for $100 to $200. After taking the class on nanofabrication, I really wanted to try this at home until I realized I would not have any way of determining whether the DNA folded correctly. So, before I try DNA origami in my kitchen, I will first need to build an atomic force microscope.